Terraform Fundamentals
Using count to Create Multiple Instances of the Same Resource Type
One great thing about using an IaC tool like Terraform is the ability to reuse code. For instance, in order to create 2 more instances like the one we already created, we won't need to have any duplicate code in our Terraform configuration. Let's see how easy we can do that:
resource "aws_instance" "example" {
  count                  = 3 # number of instance
  ami                    = "ami-0b6937ac543fe96d7"
  instance_type          = "t2.micro"
  key_name               = aws_key_pair.key_pair.key_name
  vpc_security_group_ids = [aws_security_group.allow_ssh_http.id]

  tags = {
    Name = "bvc-${count.index + 1}" # using count.index to access the current index
  }
  ...
}
Adding the count field is all you would need. However, in order to distinguish between instances, we also changed the tags field to name the instances based on their index. There's also one gotcha here. Try to plan the changes and you'll get this error:
Error: Missing resource instance key
│
│   on main.tf line 88, in output "public_ip":
│   88:   value = aws_instance.example.public_ip
The reason is that now that we have 3 instances, there's no way for Terraform to decided whose public IP to output. To fix this, we use the Terraform splat ([*]) expression:
output "public_ip" {
  value = aws_instance.example[*].public_ip
}
This will tell Terraform to output the public IP of all the instances in a list. After applying the changes, you'll see 3 instances on the console (each with different names), and also 3 public IPs printed out to the console:
Outputs:

public_ip = [
  "3.96.65.93",
  "35.183.7.154",
  "15.223.46.185",
]

At the end, don't forget to destroy everything so you won't incure any cost:
terraform destroy
Variables
Variables, as in any programming language, are a means to change the logic of your Terraform configuration without changing the code. They also make your configurations DRY (Do not Repeat Yourself), meaning you can avoid repeating values over and over; and in case of any change, you would only need to change it in one place instead of many.
This is how to declare a variable in Terraform:
variable "image_id" {
  type = string
}
This declares a variable names image_id and sets the type of the variable to string. The type field introduces static typing in Terraform, meaning that later on, if, for instance, you try to put anything other than a string in the variable image_id, Terraform will give you an error.
All fields for declaring a varibale block is optional. Here are the optional fields:
default- A default value which then makes the variable optional.type- This argument specifies what value types are accepted for the variable.description- This specifies the input variable's documentation.validation- A block to define validation rules, usually in addition to type constraints.sensitive- Limits Terraform UI output when the variable is used in configuration.nullable- Specify if the variable can be null within the module.
Here are the supported value types for the type field in Terraform:
string: a sequence of Unicode characters representing some text, like"hello".number: a numeric value. Thenumbertype can represent both whole numbers like15and fractional values like6.283185.bool: a boolean value, eithertrueorfalse.boolvalues can be used in conditional logic.list(ortuple): a sequence of values, like["us-west-1a", "us-west-1c"]. Elements in a list or tuple are identified by consecutive whole numbers, starting with zero.map(orobject): a group of values identified by named labels, like{name = "Mabel", age = 52}.
Example of using a variable
Let's assume we wanted to assign a specific tag (created_by) to any AWS resource we create using Terrafrom. Here's how we could go about doing it:
variable "created_by" {
  type = string
}
Then in the resource block, we can use the variable for setting up tags:
tags = {
    Name = "bvc"
    create_by = var.created_by
}
Note how we can reference a variable in Terraform:
var.VARIABLE_NAME
Now if we go ahead and try to plan with the terraform plan command, we will be prompted to give the variable a value:
var.created_by
  Enter a value:
The reason for that is that Terraform has currently no other way to figure out the value we intend to give the variable created_by.
Different ways of initializing a variable
Other than being prompted by Terraform during plan and apply, we can give our variables a value in multiple ways:
- Using a default value with the help of the
defaultfield - Individually, with the
-varcommand line option. - In variable definitions (
.tfvars) files, either specified on the command line or automatically loaded. - As environment variables.
Using a default value
Any variable in Terraform can have a default value. Terraform will use the default value in case the variable is not set in any way. We use the default field of the variable block to set a default value for our variables:
variable "created_by" {
    type    = string
    default = "terraform"
}
Now, if you run terraform plan or terraform apply, Terraform won't ask you for a value for created_by, although we never set it anywhere. It will just use the default value terraform for those operations.
Using the -var command like option
We can pass a value to a variable during the plan and apply phase by using the -var command line option:
terraform apply -var="created_by=terraform"
This way, Terraform won't prompt us anymore.
Using a .tfvars file
We can also create a file with the extension .tfvars and pass it to the plan and apply command. The file will have the value for our variables. Let's create a file named my_values.tfvars with the following content:
created_by = "terraform"
Now we can pass it to the plan and apply command using the -var-file command line option:
terraform plan -var-file="my_values.tfvars"
Terraform also automatically loads (no need for using the -var-file option) a number of variable definitions files if they are present:
- Files named exactly
terraform.tfvarsorterraform.tfvars.json. - Any files with names ending in
.auto.tfvarsor.auto.tfvars.json.
Rename the my_values.tfvars to terraform.tfvars and Terraform won't prompt you for the value of created_by even if you omit the -var-file command line option.
Using environment variables
We can also use environment variables to pass the value for our variables. Terraform searches the environment of its own process for environment variables named TF_VAR_ followed by the name of a declared variable.
For example, we can set the value for the created_by variable using environment variables:
export TF_VAR_created_by=terrform
Now if you run terraform plan or terraform apply, Terraform will get the value from the environment and won't prompt you for it.
Terraform File Structure
So far, we've been putting everything in just one file: main.tf. Although this is fine for showing how Terraform works and for very small projects, it is not recommended. A better approach (one that Terraform also recommends), is to split the configuration into at least three different files (main.tf, variables.tf, and output.tf). It's important to note that separating the configuration does not have any impact on how Terraform works, it just gives it a better structure and makes it more readable. When you run any Terrafrom command, such as terraform plan, Terraform scans for every .tf file in the current directory and include them in the plan.
Let's have our configuration more structured by separating variables, outputs, and creating resources.
Create a file named variables.tf and move the declaration of the variables there:
variable "created_by" {
    type = string
}
Create another file named outputs.tf and move the outputs there:
output "public_ip" {
  value = aws_instance.example[*].public_ip
}
The rest of the configuration will stay in the main.tf file. Now, if you run terraform plan, nothing has changed. But we now have a much better structure for our configuration.
Variable Definition Precedence
What if we set different values for the same variable via different ways (both in environment variables and in terraform.tfvars file, for instance)? Terraform loads variables in the following order, with later sources taking precedence over earlier ones:
- Environment variables
- The
terraform.tfvarsfile, if present. - The
terraform.tfvars.jsonfile, if present. - Any
*.auto.tfvarsor*.auto.tfvars.jsonfiles, processed in lexical order of their filenames. - Any
-varand-var-fileoptions on the command line, in the order they are provided. (This includes variables set by a Terraform Cloud workspace.)
Managing Terraform State in a Team
So far, we've used the local storage for Terraform state (it's the terraform.tfstate file in the directory you have your Terraform configuration). However, if you remember, we added that file to our .gitignore file, meaning we're not checking it in to our repo. This means that anyone who pulls the latest changes from the repo, won't have the state file. This poses a serious problem!
When you try to run Terraform without the state file, Terraform assumes that you're building things for the first time and will try to create all the resources defined in the configuration, although the resources already exist in the cloud. So, we need a way to have a central location for storing the state file. A location that every member on your team can access. Terraform solves this problem with Backends.
Terraform Backends
Terraform supports several backends for storing the state file. Choosing one depends on your tech stack and the cloud provider you're using. Since we're using AWS, we'll choose an AWS backend which consists of an S3 bucket and a DynamoDB table. The S3 bucket will be used to store the actual state file, while the DynamoDB table will be used for locking the state. State locking is important when you're working as a team. It ensures that only one person can aquire the state and change it at any given time. Any additional attempt to change the state will fail, until the lock is released by the person who's using it. Locking prevents unexpected behaviour caused by multiple changes to the state file at the same file.
Here are some of the backends that Terraform supports:
- S3 (AWS offering)
- azurerm (Microsoft Azure offering)
- gcs (Google Cloud offering)
- remote (Terraform Cloud)
Create an S3 Backend
We use Terraform to create an S3 bucket and a DynamoDB table to create a backend. It's a best practice to have your backend config separate from your rest of the infrastructure. Here's one way to do it: create a separate folder named backend and the rest of your configuration in another folder named live or production.
project
└───backend
│   │   main.tf
└───live
    │   main.tf
    │   variables.tf
    │   outputs.tf
In the main.tf file inside the backend folder, put the following configuration:
terraform {
  required_providers {
    aws = {
      source = "hashicorp/aws"
    }
  }
}

provider "aws" {
  region = "ca-central-1"
}

resource "aws_s3_bucket" "terraform_state" {
  bucket = "bvc-terraform-state"
}

resource "aws_s3_bucket_acl" "example" {
  bucket = aws_s3_bucket.terraform_state.id
  acl    = "private"
}

resource "aws_s3_bucket_versioning" "bucket_version" {
  bucket = aws_s3_bucket.terraform_state.id
  versioning_configuration {
    status = "Enabled"
  }
}

resource "aws_s3_bucket_server_side_encryption_configuration" "example" {
  bucket = aws_s3_bucket.terraform_state.id

  rule {
    apply_server_side_encryption_by_default {
      sse_algorithm = "AES256"
    }
  }
}

resource "aws_dynamodb_table" "terraform_locks" {
  name           = "terraform-locks"
  billing_mode   = "PROVISIONED"
  read_capacity  = 1
  write_capacity = 1
  hash_key       = "LockID"

  attribute {
    name = "LockID"
    type = "S"
  }
}
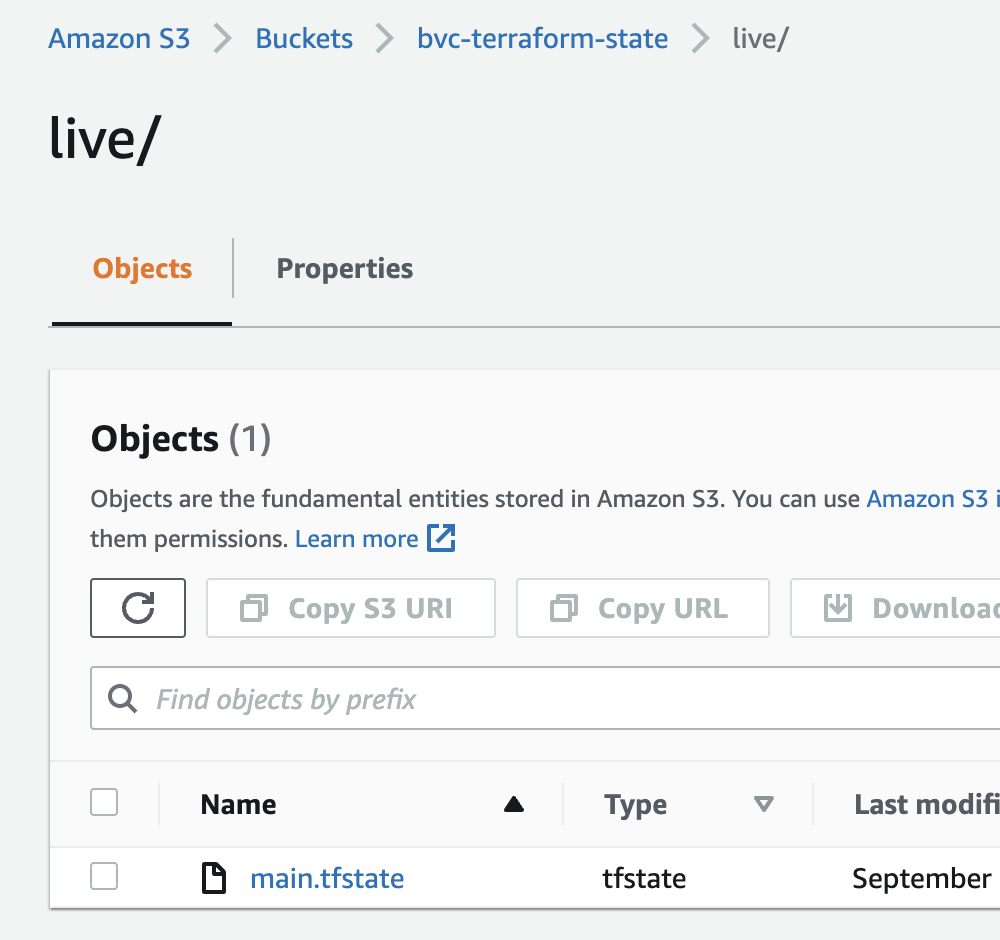
After init, plan, and apply, our S3 bucket and DynamoDB table is ready to serve as a backend. Open up your main.tf file inside the live folder and add the backend to the terraform block:
terraform {
  backend "s3" {
    bucket = "bvc-terraform-state"
    key    = "live/main.tfstate"
    region = "ca-central-1"

    dynamodb_table = "terraform-locks"
    encrypt        = true
  }
  required_providers {
    aws = {
      version = ">= 4.0.0"
      source  = "hashicorp/aws"
    }
  }
}
As with adding a provider, changing the backend also requires you to do a terraform init first. Go ahead and run terraform init. Note that because this command will now need to access the bucket and table on AWS, it DOES NEED credentials to do so. So, you would need to pass the credentials to the command in one of the ways we already discussed, such as aws-vault (aws-vault exec YOUR-PROFILE -- terraform init).
Terraform will ask you if you want to transfer the state to the remote backend. Type yes and in a few seconds, the backend is setup. Now, every changes that you make to the infrastructure will end up in the S3 bucket.